



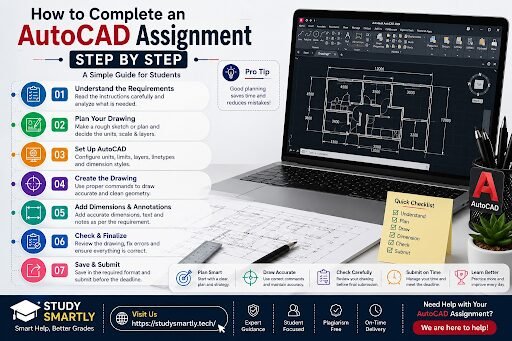
AutoCAD plays a vital role in engineering, architecture, mechanical design, and construction education. Most university assignments require students to produce accurate technical drawings while demonstrating proper use of CAD tools and drafting standards. However, many students lose marks because they skip important steps such as planning the drawing, organizing layers, or verifying dimensions before submission.
Following a structured workflow can make the entire process faster, more organized, and less stressful. Instead of relying on trial and error, you’ll know exactly what to do at each stage of your project.
In this guide, we’ll explain how to complete an AutoCAD assignment step by step, from reading the assignment brief and setting up your workspace to creating professional drawings, checking for errors, and preparing your final submission. Whether you’re a beginner or looking to improve your drafting skills, this guide will help you complete your AutoCAD assignments with greater confidence.
Table of Contents
- What Is an AutoCAD Assignment?
- Why Students Find AutoCAD Assignments Difficult
- Things You Need Before Starting
- How to Complete an AutoCAD Assignment Step by Step
- Beginner vs Smart Approach
- Common Errors and How to Fix Them
- Checklists for Every Stage
- Top 10 AutoCAD Mistakes Students Make
- Time Management Strategy for AutoCAD Assignments
- Essential AutoCAD Commands Every Student Should Know
- Best Free Resources to Learn AutoCAD
- Why Students Choose StudySmartly for AutoCAD Assignment Help
- FAQs
What Is an AutoCAD Assignment?
An AutoCAD assignment is a graded drafting task where you’re asked to produce a technical drawing, a floor plan, a mechanical part, an electrical schematic, or a 3D model using Autodesk’s AutoCAD software, following specific standards set by your instructor.
Unlike a written essay, an AutoCAD assignment is judged on precision. A wall that’s 2mm off, a missing dimension line, or an unlabeled layer can pull down your grade even if the overall design is solid.
These assignments usually fall into a few categories:
- 2D drafting tasks: floor plans, elevations, sections
- Mechanical drawings: parts, assemblies, orthographic projections
- 3D modeling tasks: solids, renderings, isometric views
- Site plans: for civil and architecture students
Whatever the category, the underlying skill being tested is the same: can you translate a design idea into an accurate, standardized technical drawing?
Why Students Find AutoCAD Assignments Difficult
Let’s be honest about this instead of glossing over it.
Most students don’t struggle because AutoCAD is inherently difficult software. They struggle because of three very specific gaps.
1. Command overload without context: You’re taught 40 commands in a lab session, but nobody explains when to use which one during an actual project.
2. No structured workflow: Students often start drawing immediately without a plan, which means constant backtracking, deleted geometry, and wasted hours.
3. Underestimating precision requirements: In AutoCAD, “close enough” doesn’t exist. A 0.5mm gap between two lines can mean a wall that technically isn’t closed, which breaks hatching, area calculations, and dimensioning.
Add a tight deadline and a professor who expects industry-standard output, and it’s easy to see why so many students end up searching for AutoCAD assignment help at 1 AM.
Pro Tip: The students who consistently score well aren’t necessarily the most “talented” ones; they’re the ones who follow a repeatable process every single time. That process is what the rest of this guide walks you through.
Things You Need Before Starting
Before you even open AutoCAD, gather these:
- The assignment brief: read it twice, not once
- Reference drawings or dimensions: given by your instructor
- AutoCAD software: (student license via Autodesk Education, if you’re enrolled)
- A drafting standard: ISO, ANSI, or whatever your course specifies
- A notebook or digital doc: for planning layers and scale
- Enough uninterrupted time: AutoCAD work suffers badly when done in 10-minute fragments
Common Mistake
Opening AutoCAD before reading the brief properly. Students often start drawing walls before realizing the assignment wanted a specific scale, sheet size, or title block format and end up redoing the entire layout.
How to Complete an AutoCAD Assignment Step by Step
This is the core of the guide. Follow these steps in order, and resist the urge to skip ahead; the sequence matters as much as the individual steps.
Step 1: Understand the Assignment Requirements Completely
Before touching the software, break the brief down into a checklist. What’s the required scale? What’s the paper size? Are dimensions in millimeters, meters, or feet? Is a title block mandatory?
Practical example: If your brief says “Draw a residential floor plan at 1:100 scale on an A3 sheet,” that single sentence dictates your drawing units, your viewport scale, and your annotation sizes before you draw a single line.
Pro Tip: Highlight every number in the brief scales, dimensions, and deadlines. Numbers are where marks are won or lost.
Common Mistake: Assuming the default AutoCAD template matches your course’s required standard. It rarely does.
Step 2: Plan the Drawing on Paper First
This sounds old-fashioned, but it’s the single biggest time-saver in this entire guide. Sketch a rough layout by hand even a messy one before opening AutoCAD.
Practical example: For a mechanical part drawing, rough out the front view, top view, and side view on paper first, so you already know how they’ll align before you start placing geometry.
Student Hack: Spend 15 minutes sketching, and you’ll save an hour of undoing bad geometry later.
Step 3: Set Up Your AutoCAD Drawing Environment
Open a new drawing and immediately configure the essentials before drawing anything:
- Set drawing units (Format → Units)
- Set your scale and sheet size
- Create your layer structure (walls, doors, windows, dimensions, text, hatching)
- Assign colors and linetypes to layers for clarity
Practical example: A floor plan should have separate layers for walls, furniture, dimensions, and text; never mix them onto Layer 0.
Common Mistake: Drawing everything on the default layer. It looks fine at first, but it makes editing, plotting, and grading a nightmare.
Step 4: Create the Base Geometry
Now you actually start drawing, but methodically. Use precise input methods (typed coordinates, Ortho mode, Object Snap) instead of eyeballing lines with the mouse.
Practical example: Instead of drawing a wall by dragging the mouse and hoping it’s straight, type the exact coordinates or length using AutoCAD’s dynamic input field.
Pro Tip: Turn on Object Snap (OSNAP) and Ortho mode from the very first line you draw. This alone eliminates most “gap” errors.
Step 5: Add Details and Components
Once the base structure exists, layer in the details: doors, windows, furniture blocks, mechanical features, or fillets and chamfers for parts drawings.
Practical example: Use AutoCAD’s block library or insert pre-made blocks for doors and windows rather than drawing each one manually every time.
Student Hack: Build a small personal library of reusable blocks early in the semester. It pays off on every assignment after that.
Step 6: Apply Accurate Dimensions
Dimensioning is where a huge number of students lose marks, mostly because they either forget it entirely or apply it inconsistently.
Practical example: Use associative dimensions so that if you tweak the geometry later, the dimension values update automatically instead of showing outdated numbers.
Common Mistake: Manually typing dimension values instead of letting AutoCAD calculate them. If your drawing is even slightly off, a manually typed dimension will lie to your grader.
Step 7: Check for Errors and Clean the Drawing
Before you consider the drawing “done,” run these checks:
- Use the Audit command to detect and fix drawing errors
- Purge unused layers, blocks, and linetypes (PURGE)
- Check for overlapping or duplicate lines
- Verify all layers are correctly assigned
Pro Tip: Zoom in at 400–800% along every wall joint and corner. Gaps that are invisible at normal zoom are exactly what break your hatching and area calculations.
Step 8: Add Text, Labels, and Title Block
Insert room labels, notes, and your title block with your name, course code, scale, and date. This is a small step that instructors specifically check for and one that’s incredibly easy to forget under deadline pressure.
Step 9: Set Up Layout, Viewport, and Print Scale
Switch to Layout space, insert a viewport, lock it at the correct scale, and arrange your sheet exactly as required.
Common Mistake: Working entirely in Model Space and forgetting Layout space exists. Many instructors specifically grade the plotted output, not the raw model.
Step 10: Export, Save, and Submit Correctly
Save your file in the required format (usually .dwg, sometimes also a .pdf export), name it according to your course’s naming convention, and double-check the file opens correctly before submission.
Student Hack: Open your submitted file on a different computer or send it to a friend to open. Corrupted or version-incompatible files are a shockingly common reason for lost marks.
Beginner vs Smart Approach
| Beginner Approach | Smart Approach |
| Start drawing immediately | Understand instructions first |
| Ignore layers | Organize layers by category |
| Skip dimensions | Add accurate, associative dimensions |
| No revisions | Double-check everything before submission |
| Draw freehand with the mouse | Use precise coordinates and OSNAP |
| Work only in Model Space | Set up Layout and viewport scale properly |
| Submit without testing the file | Open the file separately to confirm it works |
Common Errors and How to Fix Them
| Common Error | Why It Happens | How to Fix It |
| Unclosed polylines in walls | Drawn without OSNAP enabled | Enable Object Snap and use the Audit command |
| Wrong scale on plotted sheet | Viewport scale not locked correctly | Set and lock the correct scale in Layout space |
| Overlapping duplicate lines | Copy-paste errors or repeated tracing | Use Overkill command to remove duplicates |
| Dimensions showing wrong values | Manually typed instead of associative | Use associative dimensioning tools |
| Missing title block | Rushed submission | Add a checklist step before every submission |
| Layers mixed together | No layer plan before starting | Create a layer structure in Step 3 |
| File won’t open for grader | Saved in incompatible version | Save as an older .dwg version for compatibility |
Checklists for Every Stage
Before Starting Checklist
- Read the assignment brief twice
- Note the required scale, units, and sheet size
- Sketch a rough plan on paper
- Confirm AutoCAD version compatibility with your course
During Assignment Checklist
- Layers created and organized before drawing
- OSNAP and Ortho mode enabled
- Base geometry closed and accurate
- Dimensions applied using associative tools
- Text and labels added clearly
Before Submission Checklist
- Ran Audit and Purge commands
- Checked for gaps and duplicate lines
- Verified title block information
- Confirmed Layout scale is correct
- Saved in the correct file format and naming convention
- Opened the file on a separate device to confirm it works
Top 10 AutoCAD Mistakes Students Make
- Skipping the planning stage and jumping straight into drawing.
- Ignoring layer organization: which makes editing painful later.
- Eyeballing measurements: instead of using precise input.
- Forgetting Object Snap: leading to invisible gaps in geometry.
- Manually typing dimensions: instead of using associative tools.
- Never running Audit or Purge: before submission.
- Forgetting the title block: entirely.
- Working only in Model Space: and ignoring Layout scale setup.
- Not backing up work: then losing hours to a crash.
- Submitting without testing the file: on another machine.
Common Mistake: AutoCAD files can and do get corrupted. Save incrementally (Ctrl+S every 10 minutes) and keep at least one backup copy in a separate location.
Time Management Strategy for AutoCAD Assignments
AutoCAD assignments punish last-minute work more than almost any other type of coursework, simply because precision takes time you can’t rush.
Here’s a realistic breakdown for a typical multi-day assignment:
- Day 1: Read the brief, plan on paper, set up the drawing environment and layers
- Day 2: Build the base geometry and add components
- Day 3: Apply dimensions, labels, and title block
- Day 4: Error-check, clean up, set up layout and scale
- Final day: Export, test the file, and submit early, not at the deadline
Student Hack: Treat the day before your deadline as a buffer day, not a working day. Something will go wrong: a missing plugin, a corrupted file, a printer that won’t cooperate, and buffer time is what saves your grade.
Even if you only have one day, compress this same sequence rather than skipping stages. A rushed floor plan with correct layers and dimensions will still outscore a rushed one without them.
Essential AutoCAD Commands Every Student Should Know
| Command | Shortcut | What It Does |
| Line | L | Draws straight line segments |
| Polyline | PL | Draws connected line segments as one object |
| Circle | C | Draws a circle |
| Trim | TR | Cuts objects at intersection points |
| Extend | EX | Extends objects to meet a boundary |
| Offset | O | Creates parallel copies at a set distance |
| Mirror | MI | Creates a mirrored copy of selected objects |
| Array | AR | Creates repeated patterns of objects |
| Dimension Linear | DLI | Adds a linear dimension |
| Hatch | H | Fills an area with a pattern |
| Layer | LA | Opens the Layer Properties Manager |
| Audit | AUDIT | Checks and fixes drawing errors |
| Purge | PU | Removes unused layers, blocks, and styles |
| Overkill | OVERKILL | Removes duplicate overlapping objects |
| Scale | SC | Resizes selected objects |
Best Free Resources to Learn AutoCAD
You don’t need to pay for every learning resource. Some of the best material is free:
- YouTube: channels dedicated to step-by-step AutoCAD tutorials for beginners
- Autodesk’s own tutorials and documentation: the most accurate source for command references and updates
- Autodesk Education access: free student licenses if you’re enrolled in a qualifying program
- Practice drawing repositories: sites offering downloadable practice drawings to rebuild
- StudySmartly’s guides: structured, student-focused walkthroughs designed specifically around common assignment formats
Mixing official documentation with practical, student-focused guides tends to work better than relying on just one source. Official docs tell you what a command does; student-focused guides tell you when and why you’d actually use it.
Why Students Choose StudySmartly for AutoCAD Assignment Help
Not every student has the time to become an AutoCAD expert overnight, especially when it’s one assignment among five other deadlines in the same week. That’s where StudySmartly fits in.
Here’s what students consistently mention when they talk about working with us:
- Expert guidance from people who actually understand drafting standards, not just software basics
- Step-by-step support that explains the “why” behind each part of your drawing, not just a finished file
- Student-friendly explanations that match your course level, whether you’re a first-year student or finishing a capstone project
- On-time assistance, because AutoCAD deadlines rarely move
- Affordable solutions built around student budgets
- Plagiarism-free work, with original drawings built specifically around your brief
Whether you need a full AutoCAD assignment done from scratch, help fixing a drawing that keeps throwing errors, or a second pair of eyes before submission, StudySmartly’s AutoCAD assignment help is built around actually helping you understand the process, not just handing over a file.
Need Help With Your AutoCAD Assignment?
If you’re running out of time or struggling with complex AutoCAD drawings, StudySmartly can help. Our experts provide personalized AutoCAD assignment assistance with accurate drawings, plagiarism-free work, and timely delivery so you can focus on learning while meeting your deadlines.
Conclusion
Completing an AutoCAD assignment step by step comes down to one habit: plan before you draw. Set up your layers, use precise input, dimension correctly, and check your work before submitting; that’s the whole game.
If your deadline is closing in faster than your drawing is coming together, StudySmartly can help you finish strong.
FAQs
How long does it take to complete an AutoCAD assignment?
It depends on complexity, but a typical floor plan or mechanical drawing assignment takes 4–10 hours when done methodically. Rushed attempts often take longer overall because of repeated corrections.
What’s the best AutoCAD version for student assignments?
Use whichever version your institution specifies, since drawing files aren’t always backward-compatible. If there’s no requirement, the current Autodesk Education release is usually the safest choice.
Do I need to know coding to use AutoCAD?
No. Basic AutoCAD assignments don’t require any scripting knowledge. AutoLISP or scripting becomes relevant only in advanced automation tasks, not standard coursework.
Why does my AutoCAD drawing look different when plotted?
This usually happens when your Layout viewport scale doesn’t match your intended print scale, or when line weights haven’t been assigned to layers correctly.
What’s the difference between Model Space and Layout Space?
Model Space is where you build your actual drawing at real-world scale. Layout Space is where you arrange that drawing onto a printable sheet with a set scale and title block.
How do I fix a drawing that won’t close properly (open polylines)?
Use the Audit command to detect open geometry, then manually verify wall corners using Object Snap. Enabling OSNAP from the start prevents this from happening.
Should I use associative or manual dimensions?
Always use associative dimensions. They update automatically if your geometry changes, keeping your drawing accurate without extra manual work.
What file format should I submit for AutoCAD assignments?
Usually .dwg, unless your instructor specifically asks for a .pdf export or .dxf format. Always confirm the required format in the brief.
How do I organize layers properly for a floor plan?
Separate layers by category: walls, doors, windows, furniture, dimensions, and text, each with distinct colors so they’re easy to isolate and edit.
What’s the fastest way to learn AutoCAD commands?
Practice with small, repeated exercises rather than memorizing command lists. Muscle memory from actual drawing practice sticks far better than passive reading.