



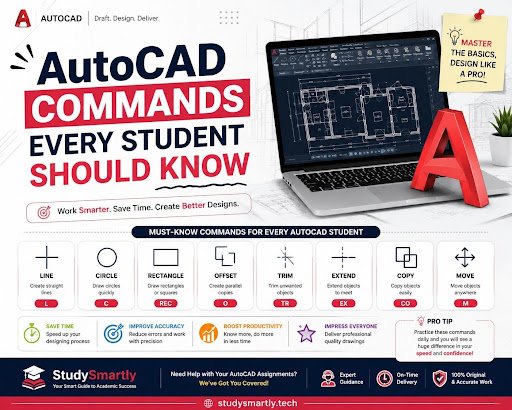
AutoCAD is one of the most widely used computer-aided design (CAD) software applications in engineering, architecture, interior design, and construction. Universities around the world include AutoCAD in their curriculum because it helps students create precise technical drawings and develop industry-ready skills.
However, simply knowing the software isn’t enough. To work efficiently, students must understand the essential AutoCAD commands that professionals use every day. In this guide, we’ll break down the most important AutoCAD commands, explain how they work, and show you how they can improve the speed, accuracy, and quality of your assignments.
Table of Contents
- What Are AutoCAD Commands, Really?
- Why Commands Beat Clicking Through the Ribbon
- The Core Commands Every Student Should Know
- Quick-Reference Command Table
- Hidden Commands Most Students Ignore
- Commands That Impress Professors
- Commands That Save Hours on Assignments
- Most-Used Commands in Real Engineering Projects
- Architecture vs. Mechanical Students: Different Priorities
- Top Beginner Mistakes With Commands
- Keyboard Shortcut Cheat Sheet
- A 4-Week Command Practice Plan
- Pre-Submission Checklist
- Conlusion
- FAQs
What Are AutoCAD Commands, Really?
An AutoCAD command is just a typed instruction that tells the program what to draw, move, or fix instead of you finding the same action buried in a ribbon tab.
Type L, hit Enter, and AutoCAD knows you want a line. Type TR, and it knows you want to trim something back. That’s the whole idea: skip the menu, talk to the software directly.
Most commands come with a short alias, usually one, two, or three letters, so you rarely type the full word. CIRCLE becomes C. MOVE becomes M. Once a handful of these are muscle memory, your hands barely leave the keyboard.
Student Note: You don’t need to memorize all of AutoCAD’s commands; there are hundreds. You need about 25–30 that cover 90% of what a typical assignment asks for. That’s what this guide focuses on.
Why Commands Beat Clicking Through the Ribbon
Here’s the honest comparison. Say you want to trim three overlapping lines back to a wall.
With the ribbon: click Home tab, find Modify panel, click the small arrow for more tools, find Trim, click it, then click each line.
With the command line: type TR, press Enter twice, click each line.
Same result. Half the clicks, a third of the time. Multiply that across a 40-command drawing, and the difference between a student who clicks and one who types isn’t small; it’s often the difference between finishing an assignment in an hour versus three.
There’s a second reason commands matter more than most students realize: every AutoCAD job posting and every drafting internship assumes you already know them. Nobody trains you on shortcuts at a job; you’re expected to arrive fluent.
Expert Advice: If you only remember one thing from this section, remember this: the ribbon is a menu for people who don’t know the command yet. Once you know it, you never open that menu again.
The Core Commands Every Student Should Know
These are grouped the way you’ll actually use them: draw something, fix something, label something, organize it, then look at it properly. For each command below, you’ll find its purpose, shortcut, a real use case, the mistake beginners make, and a pro tip.
Drawing Commands
LINE
- Shortcut: L
- Purpose: Draws a straight segment between two points.
- When to use: Walls, structural members, reference lines, anything straight.
- Example: Drawing the outer boundary of a floor plan before adding interior walls.
- Common mistake: Not using Ortho mode (F8) or polar tracking, so “straight” lines end up a fraction of a degree off.
- Pro tip: Turn on Ortho mode before you start a wall layout; it forces perfectly horizontal or vertical lines.
- Difficulty: Beginner | Time saved: Minutes per drawing, but accuracy saved is bigger than time saved.
CIRCLE
- Shortcut: C
- Purpose: Draws a circle from a center point and radius (or other methods like 2-point or 3-point).
- When to use: Bolt holes, columns, pipe cross-sections, wheels.
- Example: Placing four bolt holes on a mechanical bracket drawing.
- Common mistake: Typing a diameter when AutoCAD is asking for a radius, resulting in a circle twice the intended size.
- Pro tip: Type D right after starting the command if you want to enter a diameter instead of a radius.
- Difficulty: Beginner | Time saved: A few minutes per repeated shape.
RECTANGLE
- Shortcut: REC
- Purpose: Draws a rectangle from two opposite corners.
- When to use: Rooms, panels, structural sections, title block borders.
- Example: Blocking out a room before adding doors and windows.
- Common mistake: Forgetting it draws a closed polyline, so trimming individual sides later behaves differently than expected.
- Pro tip: Use the Area or Dimensions option inside the command to draw a rectangle of an exact size without doing the math yourself.
- Difficulty: Beginner | Time saved: Replaces four separate LINE commands.
POLYLINE
- Shortcut: PL
- Purpose: Draws connected straight or curved segments as one single object.
- When to use: Outlines, paths, anything you’ll later need to offset or measure as one shape.
- Example: Tracing a building outline so you can offset it once to create wall thickness.
- Common mistake: Using separate LINE segments instead, then struggling to select the whole shape at once later.
- Pro tip: Use the Width option mid-command to create tapered or thick lines, handy for arrows and callouts.
- Difficulty: Beginner-Intermediate | Time saved: Huge one selection instead of ten.
Modify Commands
MOVE
- Shortcut: M
- Purpose: Relocates selected objects by a distance and direction.
- When to use: Repositioning furniture blocks, aligning parts, adjusting layout.
- Example: Shifting a door block two feet to line up with a wall opening.
- Common mistake: Selecting a base point that isn’t actually on the object, causing inaccurate placement.
- Pro tip: Use Object Snap (endpoint or midpoint) for the base point; it guarantees exact alignment.
- Difficulty: Beginner | Time saved: Minutes, but precision gained is the real win.
COPY
- Shortcut: CO or CP
- Purpose: Duplicates selected objects, with the option to place multiple copies in one go.
- When to use: Repeating windows, chairs, bolts, or any repeated element.
- Example: Copying a window block along a wall at even intervals.
- Common mistake: Forgetting the Multiple option is on by default in recent versions, and accidentally placing extra copies.
- Pro tip: Combine with the Array command instead when spacing needs to be mathematically even.
- Difficulty: Beginner | Time saved: Massive on repetitive layouts.
TRIM
- Shortcut: TR
- Purpose: Cuts objects back to a boundary edge.
- When to use: Cleaning up wall intersections, cutting a line at a door opening.
- Example: Trimming wall lines where a doorway needs an opening.
- Common mistake: Selecting the wrong boundary, so nothing trims, or pressing Enter without selecting a boundary at all (which trims against everything visible, risky in a busy drawing).
- Pro tip: Press Enter without selecting a boundary edge only in simple drawings; in complex ones, pick specific boundaries so you don’t accidentally cut the wrong object.
- Difficulty: Beginner-Intermediate | Time saved: One of the highest-value commands in the whole program.
OFFSET
- Shortcut: O
- Purpose: Creates a parallel copy of a line, arc, or polyline at a set distance.
- When to use: Wall thickness, road widths, parallel piping, matching border spacing.
- Example: Offsetting a single outline by 6 inches to create wall thickness instantly.
- Common mistake: Offsetting the wrong side, then having to undo and redo.
- Pro tip: Watch the live preview before clicking; AutoCAD shows you exactly where the offset will land.
- Difficulty: Beginner | Time saved: Turns a 10-minute wall-thickness job into 10 seconds.
FILLET
- Shortcut: F
- Purpose: Joins two lines with a rounded corner (or a sharp corner if radius is set to zero).
- When to use: Rounded corners on mechanical parts, or quickly squaring off two lines that don’t quite meet.
- Example: Rounding the corner of a metal bracket to a 5mm radius.
- Common mistake: Forgetting to set the radius first, so a fillet with the wrong size appears (or a previous radius gets reused by accident).
- Pro tip: Set radius to 0 and use Fillet as a fast way to square up two lines that overshoot or fall short of each other.
- Difficulty: Intermediate | Time saved: Replaces trimming and drawing an arc manually.
ARRAY
- Shortcut: AR
- Purpose: Repeats an object in a grid, path, or circular pattern.
- When to use: Rows of parking spaces, bolt patterns, columns in a building grid.
- Example: Placing 12 evenly spaced bolts around a circular flange.
- Common mistake: Using Copy repeatedly instead, then discovering the spacing is slightly uneven.
- Pro tip: Polar Array with the “fill angle” option is the fastest way to space objects around a circle exactly.
- Difficulty: Intermediate | Time saved: Can save 20+ minutes on a repetitive layout.
Annotation & Dimensioning Commands
MTEXT
- Shortcut: MT or T
- Purpose: Adds a multi-line paragraph of text.
- When to use: Notes, specifications, general callouts.
- Example: Adding a materials note block in the corner of a drawing.
- Common mistake: Using single-line TEXT for long notes, which makes formatting a headache later.
- Pro tip: Set your text style and height before you start typing; resizing dozens of text objects afterward is tedious.
- Difficulty: Beginner | Time saved: Keeps notes editable as one paragraph instead of many.
DIMLINEAR
- Shortcut: DLI
- Purpose: Adds a horizontal or vertical dimension between two points.
- When to use: Labeling wall lengths, part widths, and heights.
- Example: Dimensioning the width of a room on a floor plan.
- Common mistake: Snapping to the wrong endpoint, giving a dimension that’s technically correct but not what the assignment asked for.
- Pro tip: Set up a dimension style first; professors notice inconsistent arrow sizes and text heights immediately.
- Difficulty: Beginner-Intermediate | Time saved: Prevents the most common point deduction on drafting assignments.
HATCH
- Shortcut: H
- Purpose: Fills an enclosed area with a pattern (concrete, brick, insulation, and so on).
- When to use: Section cuts, material call-outs, wall fills.
- Example: Filling a wall section with a brick pattern in an architectural drawing.
- Common mistake: Clicking inside a boundary that isn’t fully closed, so the hatch either fails or “leaks” across the whole drawing.
- Pro tip: Use the Boundary option and zoom in on corners first; if a hatch keeps failing there’s almost always a tiny gap.
- Difficulty: Intermediate | Time saved: Manual hatching by hand would take hours; this takes seconds.
Layer, Block & Organization Commands
LAYER
- Shortcut: LA
- Purpose: Opens the layer manager to create, rename, freeze, or color-code layers.
- When to use: Organizing walls, dimensions, text, and hatching onto separate, controllable layers.
- Example: Putting all dimension lines on a “Dimensions” layer so they can be hidden for a cleaner presentation print.
- Common mistake: Drawing everything on Layer 0, which makes later edits and printing color-coding nearly impossible.
- Pro tip: Set up your layer structure before you draw a single line, not after. Retrofitting layers onto a finished drawing wastes far more time.
- Difficulty: Beginner, but easy to underestimate | Time saved: Saves entire re-do sessions later in the project.
BLOCK
- Shortcut: B
- Purpose: Groups multiple objects into a single, reusable, named object.
- When to use: Doors, windows, furniture, symbols you’ll reuse across a drawing or between drawings.
- Example: Creating one door block, then inserting it wherever a door appears instead of redrawing it each time.
- Common mistake: Copying and pasting the same drawn shape repeatedly instead of turning it into a block; any later edit then has to be repeated by hand everywhere.
- Pro tip: Update the block definition once, and every inserted copy across the drawing updates automatically.
- Difficulty: Intermediate | Time saved: One of the biggest time-savers on any multi-symbol drawing.
Common Mistake (across all commands): Skipping Object Snap (OSNAP) entirely. Every command above becomes far less accurate without it. Turn it on early and leave it on.
Quick-Reference Command Table
| Command | Shortcut | Purpose | Best Used For | Difficulty |
| LINE | L | Draws a straight segment | Walls, structural lines | Beginner |
| CIRCLE | C | Draws a circle | Bolts, columns, pipes | Beginner |
| RECTANGLE | REC | Draws a rectangle | Rooms, panels, borders | Beginner |
| POLYLINE | PL | Draws connected segments as one object | Outlines, paths | Beginner |
| ARC | A | Draws an arc | Curved paths, rounded features | Beginner |
| ELLIPSE | EL | Draws an ellipse | Curved cross-sections | Beginner |
| POLYGON | POL | Draws a regular polygon | Bolt heads, structural shapes | Beginner |
| MOVE | M | Relocates objects | Repositioning any element | Beginner |
| COPY | CO / CP | Duplicates objects | Repeated elements | Beginner |
| ERASE | E | Deletes objects | Removing mistakes | Beginner |
| TRIM | TR | Cuts objects to a boundary | Wall openings, cleanup | Intermediate |
| EXTEND | EX | Extends objects to a boundary | Closing small gaps | Intermediate |
| OFFSET | O | Creates a parallel copy | Wall thickness, spacing | Beginner |
| MIRROR | MI | Flips a mirrored copy | Symmetrical layouts | Beginner |
| FILLET | F | Rounds or squares a corner | Rounded edges, corner fixes | Intermediate |
| CHAMFER | CHA | Bevels a corner at an angle | Mechanical edges | Intermediate |
| ARRAY | AR | Repeats in a grid, path, or circle | Bolt patterns, grids | Intermediate |
| ROTATE | RO | Rotates objects around a point | Angled layouts | Beginner |
| SCALE | SC | Resizes objects | Adjusting block sizes | Beginner |
| STRETCH | S | Moves part of an object | Adjusting wall lengths | Intermediate |
| EXPLODE | X | Breaks a block or polyline into parts | Editing inserted blocks | Intermediate |
| MTEXT | MT | Adds paragraph text | Notes, specifications | Beginner |
| DIMLINEAR | DLI | Adds a linear dimension | Labeling lengths and widths | Intermediate |
| LEADER / MLEADER | LE / MLD | Adds a labeled callout line | Part numbers, notes | Intermediate |
| HATCH | H | Fills an area with a pattern | Materials, section cuts | Intermediate |
| LAYER | LA | Manages layers | Organizing the whole drawing | Beginner |
| MATCHPROP | MA | Copies properties between objects | Fixing inconsistent formatting | Intermediate |
| BLOCK | B | Groups objects into one reusable object | Doors, windows, symbols | Intermediate |
| PURGE | PU | Removes unused layers, blocks, styles | Cleaning up file size | Intermediate |
| ZOOM | Z | Zooms the view | Navigating the drawing | Beginner |
Quick Tip: This table alone covers roughly 90% of a typical semester’s worth of AutoCAD assignments. Screenshot it, print it, or pin it next to your monitor.
Hidden Commands Most Students Ignore
A few commands never make it into intro-level tutorials, but they solve real, recurring headaches.
- OVERKILL: removes duplicate, overlapping objects automatically. Priceless when you’ve traced over an imported drawing and ended up with doubled lines.
- AUDIT: checks a drawing file for errors and fixes what it safely can. Run this before submitting anything if AutoCAD has been acting strangely.
- PURGE: strips out unused layers, blocks, and styles, shrinking file size and cleaning up dropdown lists that are cluttered with leftovers.
- OOPS: brings back the last object you erased, even after other commands have run in between. Different from Undo, and often faster in the moment.
- QUICKCALC: opens a built-in calculator you can use mid-command, so you’re not tabbing out to your phone to do math.
Student Note: None of these commands “draw” anything. They clean up, fix, and calculate, which is exactly why students skip them and exactly why they’re worth learning.
Commands That Impress Professors
Professors grading drafting assignments notice a handful of things almost immediately, and they have nothing to do with how fast you drew the shapes.
- Consistent layers (via LAYER): a drawing where dimensions, text, and hatching all sit on clearly named, color-coded layers reads as professional, not accidental.
- Clean dimension styles (DIMSTYLE): matching arrow sizes and text heights across the whole sheet.
- Purged files (PURGE): a submission with no leftover junk layers or unused blocks.
- Blocks instead of repeated shapes (BLOCK, INSERT): shows you understand reusability, not just drawing.
Expert Advice: If you’re short on time before a deadline, prioritize LAYER and DIMSTYLE consistency over adding extra detail. Graders notice organization faster than they notice extra linework.
Commands That Save Hours on Assignments
Some commands don’t just save minutes; they save entire redo sessions.
- OFFSET: for wall thickness instead of manually drawing parallel lines.
- ARRAY: for any repeated pattern instead of copying one at a time.
- BLOCK: for anything you’ll reuse more than twice in the same drawing.
- MATCHPROP: for fixing inconsistent line weights or colors across dozens of objects in one click instead of editing each one.
- Grips + STRETCH: for adjusting a layout after a professor asks for a last-minute room resize, instead of redrawing from scratch.
Most-Used Commands in Real Engineering Projects
Once you’re past coursework and into an internship or a real project, the frequency shifts slightly. Based on typical drafting workflows in practice, these come up constantly:
- LAYER, XREF (external references for combining multiple drawing files), MATCHPROP, SCALE, and PURGE see far more use in professional settings than in a typical homework assignment, because real projects involve many linked files and multiple people editing the same drawing set.
- DIMSTYLE and LAYER standards are often locked by a company template (called a CAD standard), so knowing how to work within an existing layer structure matters more than creating one from scratch.
Student Note: If your course touches on XREF, pay attention; it’s rarely covered in depth in intro classes but shows up constantly in real firms.
Architecture vs. Mechanical Students: Different Priorities
Both majors use the same core command set, but the emphasis shifts.
Architecture students lean on:
- HATCH (materials, wall sections)
- BLOCK / INSERT (doors, windows, furniture, fixtures)
- DIMLINEAR and DIMALIGNED for room and site dimensions
- LAYER organization for multi-sheet sets (floor plans, elevations, sections)
Mechanical students lean on:
- FILLET and CHAMFER for machined edges
- CIRCLE and ARRAY for bolt patterns and holes
- DIMANGULAR and tolerance-based dimensioning
- MIRROR for symmetrical part geometry
Neither list replaces the other; think of it as which commands you’ll reach for first, not commands you can skip.
Top Beginner Mistakes With Commands
- Skipping Object Snap: Freehand clicking instead of snapping to endpoints and midpoints is the single biggest source of “close enough” drawings that fail a precision check.
- Drawing everything on Layer 0: Fine for a five-minute sketch, painful for anything graded.
- Not setting units first: Drawing at the wrong scale because UNITS was never configured at the start of the file.
- Copying instead of blocking: Repeated symbols that should be one editable block, scattered as dozens of separate copies.
- Ignoring dimension styles: Default arrow sizes that look fine at one zoom level and enormous or tiny at another.
- Ignoring Ortho mode: Walls and lines that are almost, but not quite, straight.
- Never using PURGE. Files bloated with unused layers and blocks from earlier drafts.
- Trimming without a clear boundary. Cutting the wrong object because a boundary wasn’t selected carefully in a busy drawing.
- Forgetting to save incrementally. Losing an hour of work because of one crash with no backup file.
- Never running AUDIT. Submitting a file that’s silently corrupted and opens differently on the professor’s computer.
Common Mistake: Many of these aren’t command mistakes at all; they’re setup mistakes. Ten minutes spent on units, layers, and dimension styles before you draw anything prevents most of this list.
Keyboard Shortcut Cheat Sheet
A condensed list to keep near your keyboard while you work:
- L — Line
- C — Circle
- REC — Rectangle
- PL — Polyline
- M — Move
- CO — Copy
- TR — Trim
- EX — Extend
- O — Offset
- MI — Mirror
- F — Fillet
- AR — Array
- RO — Rotate
- SC — Scale
- H — Hatch
- LA — Layer
- B — Block
- Z — Zoom
- U — Undo
- Ctrl+S — Save
A 4-Week Command Practice Plan
You don’t build command fluency by reading a list once; you build it by using the same ten commands until your hands stop thinking about them.
Week 1: Draw and Delete: LINE, CIRCLE, RECTANGLE, ERASE, ZOOM. Redraw a simple floor plan or part outline from a photo or textbook example, using only these five.
Week 2: Modify: MOVE, COPY, TRIM, EXTEND, OFFSET. Take last week’s drawing and edit it: resize a room, add a second identical part, adjust a wall.
Week 3: Organize and Annotate: LAYER, BLOCK, MTEXT, DIMLINEAR, HATCH. Rebuild the drawing with proper layers, add a reusable block, dimension it, and hatch one material.
Week 4: Clean and Finish: MATCHPROP, PURGE, AUDIT, ARRAY, FILLET. Take a messier practice file (or a classmate’s) and clean it up using these five.
Quick Tip: Time yourself each week on the same small drawing. Watching that number drop is the clearest proof the commands are sticking.
Conclusion
None of this is about memorizing a hundred commands overnight. It’s about picking the fifteen or twenty that show up in almost every assignment, and using them enough times that your hands stop hesitating.
Start with LINE, TRIM, OFFSET, and LAYER this week. Add MOVE, COPY, and BLOCK next week. Within a month, you’ll notice you’re not thinking about the software anymore; you’re thinking about the drawing.
That’s the actual goal. Not speed for its own sake, but enough fluency with the tool that it gets out of the way of the design work you’re actually trying to do.
If you want more structured practice guides or study breakdowns for topics like this, resources like StudySmartly.tech can be a useful supplement alongside your coursework, worth treating as a learning aid to build your own skills with, not a substitute for doing the drawing yourself.
FAQs
What is the most commonly used command in AutoCAD?
LINE is generally the most-used command, since nearly every drawing starts with straight geometry. TRIM and OFFSET follow closely, since almost every edit involves cutting back or spacing out existing lines.
What are the basic AutoCAD commands for beginners?
LINE, CIRCLE, RECTANGLE, MOVE, COPY, TRIM, OFFSET, and LAYER cover the core of most first-semester assignments. Master these before moving to dimensioning and blocks.
How can I memorize AutoCAD commands faster?
Practice the same 10–15 commands repeatedly on small drawings rather than trying to memorize a long list at once. Typing beats reading for building command muscle memory.
Is it better to use commands or the ribbon in AutoCAD?
Commands are faster once memorized, but the ribbon is a fine training tool for beginners still learning what each tool does. Most experienced users rely on commands almost exclusively.
What’s the difference between TRIM and EXTEND?
TRIM cuts an object back to a boundary; EXTEND stretches an object out to meet a boundary. They’re opposite operations that share very similar workflows.
What AutoCAD commands do architecture students need most?
HATCH, BLOCK, DIMLINEAR, and LAYER organization tend to matter most, since architectural drawings rely heavily on materials, reusable symbols, and multi-sheet organization.
What AutoCAD commands do mechanical students need most?
FILLET, CHAMFER, CIRCLE, ARRAY, and precise dimensioning commands come up constantly in mechanical part drawings and bolt patterns.
Can I customize AutoCAD command shortcuts?
Yes. The CUI (Customize User Interface) editor lets you reassign or create shortcuts for any command, which is worth exploring once you have a personal workflow you repeat often.
How do I recover an AutoCAD file that crashed or corrupted?
Use the RECOVER command to open and repair a damaged file, or check the Drawing Recovery Manager, which AutoCAD opens automatically after a crash.
How long does it take to get fast at AutoCAD commands?
Most students notice a real speed difference within two to three weeks of consistent practice, and feel genuinely fluent after a semester of regular use.